Monday, July 28, 2014

Dallas trip and Monday Made It

This past weekend was SO. MUCH. FUN! 

My mother in law got married on Friday so the Hubs and I went up to Dallas for the ceremony and to spend some QT with family! 

Here is my handsome husband and I killing some time before the ceremony:


I just love this goofy man!


A quick pic of the happy couple saying their nuptials


And the Mr. and I with his sisters and brother in law


This group is a good time, let me tell you! :) 

It is always so great seeing family and I wish we could go up there more! Although, we ate out a LOT. Seriously, amazing food! I am talking so full you can barely walk out of the restaurant amazing food!! So maybe it is a good things we only make it up there a few times a year ;) 

 As you can see, the trip took a toll on my boys. This is them on the ride home, ha! 


Ok ok now enough about my weekend. It is time for (drum roll please) another addition of 


4th Grade Frolics is so awesome for hosting this every week! I just love getting ideas from so many creative teachers and seeing what everyone has been crafting over the week!! 
So my 1st made it is more of an "assisted made it" if you will. ;) If you have never seen my blog before, first, Welcome!! Second, as of my last "Made it Monday" this is what my blog looked like...


Veerrrrrrrry different right? The old one was simple. Kinda boring. Nothing special. 

I was so over it!

Luckily for me, I just so happen to follow this amazing teacher, blog designer, and all around great person Lindsey on Instagram! After I saw some of her work and checked out her amazing prices, I just knew I had to strike while the iron was hot!

If you are thinking about starting a blog or you have one and it needs a major facelift (like mine) you should go check out Lindsey at Blog Designs with the Teacher in Mind. I cannot say enough about how great working with her was! She is THE most affordable designer I found, every single blog design of hers looks different because they are based on exactly what the customer wants. Plus, she respond back to e-mails crazy fast which, being extremely eager about the whole blog makeover, I really appreciated! 

I am telling you, go check her out! Then come back and thank me when you are as in love with your new blog as I am with mine ;) 


Now this I made alllllllll by myself :) 

About 2 weeks ago I got these Plain Jane clipboards (that I wrote about in my Dollar Store Treasures post) and knew I wanted to decorate them! I reserved a few to glam up for my brand new team this year, but I wanted to share the one I made for myself!

*Disclaimer: I am not a planner, a measurer, or a perfectionist. When I make things, I kinda just "go for it". So, if you find yourself being slightly anal retentive when working on projects, my way of going about this may make you cringe! You have been warned ;) 

First, I picked through some papers from my old scrap booking days and found a couple I wanted to use. 

Next, I traced the outer edge of the clip board onto the scrap book paper and cut it out. I then laid the top paper under the clip and drew how wide a cut out I needed to make. Next, I took a piece of scrap paper to "measure" how deep of a cut I need to make for the clip. This is what I ended up with for the top paper: 


Because I knew my paper would not fit perfectly around the clip or outer edges, I painted the top portion and edges of my clip board.

Once the paint was dry, I went to town with some Mod Podge! (love that stuff!) Mine dries clear with a  little bit of a glossy finish but you could use the matte finish too. 

I laid the scrapbook paper down and starting from the middle, I smoothed the paper out to avoid wrinkles and bubbles. I always use some type of plastic card (in this case, a Staples gift card) to flatten it and it works just fine! 

I repeated the same process for the back and added an extra strip of scrapbook paper in the middle on both sides. Then, I put my name to the back and a cute little white, burlap "bow" over the clip on the front. Voila! 


I just love the way it came out! I can't wait to make a few more!

My last made it is about a little Meet the Teacher (yes already!) prep work.

When I pinned this adorable idea for Meet the Teacher from First Grade with a cherry on top I knew that I wanted to use it this year for meet the teacher! 


My sweet sweet husband cut out all of the tags and I tied them on to 21 little bubble bottles. Now from past experience, I know good and well that I will probably only have about 10 families (at the very most) show up for meet the teacher... but a girl can hope right! 

I also whipped up these little apples for my Meet the Teacher "Giving Tree" 

I did a couple of each item juuuuuuuuust incase I have lots of parents who want to make donations!


I still cannot believe it is almost August! I am hoping to get into my classroom this week so that I can get started and try to ease into the school year this year! 


Monday, July 21, 2014

Made it Monday


Well I am back to link up with the fabulous 4th Grade Frolics for another Made it Monday! 

This past week I did not really make anything for the classroom (and the countdown for back to school is on - eek!) but I have made a few gifts and some yummy healthy food! 

I even attempted my first freebie via google docs :) We shall see how that goes... 


This first little somethin somethin was for one of my best friend's housewarming party. Well actually, she insisted that it was not a housewarming party and that it was a "Hey everyone come see this house we bought and swim in our pool!!" party and insisted on no gifts! Who doesn't want gifts?!? 

Well I did not want to go against her wishes but I wasn't about to show up empty handed either! So I compromised... I made her favorite cookies in a pretty cute jar, if I do say so myself :) 


In hindsight, I wish I had put a bow on the top but eh, what are ya gonna do? 


My next made it was a belated birthday gift for my "baby" brother. We couldn't get together on his actual b-day due to conflicting work schedules but here is us FINALLY celebrating at my parents' house last night:

After my brother shaved his head everyone says we looks alike. Thanks...I guess? (I still don't see it!) 

Aaaaanyway, I don't know about anyone else out there, but the men in my family are notoriously difficult to shop for. I considered about 5 different things to get him before finally going with something I knew he would love....CASH! :) 

Now I feel bad giving cash because while I think everyone enjoys receiving it, it just doesn't strike me as that thoughtful of a gift. It's like, "Here, I like you enough to take the 2 minutes to stop by an ATM on the way here to get this for you." Whomp whomp...

So to jazz it up a bit, I went to everyone's #1 source of inspiration: PINTEREST! I am sure everyone has probably seen this idea by now, but I love the "something special hidden inside a jar of candy" tick. And by trick of course I mean gift ;) 

Here is mine: 

Aaaand because I am totally lame creative, I decided to rev it up a bit by adding a little riddle to the tag:


I love this idea so much because you can use it for ANY kind of gift (Christmas, graduation, anniversary, just because, etc) and there are so many different things you could hide inside (concert tickets, plane tickets, event tickets, maybe a gift card - although not in the tube, jewelry...)

If you like the little card I made, you can get it by clicking on the picture (fingers crossed)! I have that blue tag and then a pink tag as well. :) 

***This is my 1st attempt at using google docs so if you try and click it and it doesn't work, please let me know!!***

While I was out getting candy for the brother I of course had to get candy for the hubster too:


He gets cheesy notes and puns from me all of the time so he is pretty used to it :) 


My last made it of the week is actually a recipe I found on pinterest and I am really excited about! I am not really a "breakfast person" so when I find a food I can easily have for breakfast and that will keep me somewhat satisfied until lunch, it makes me happy happy happy! 

Here are my yummy little Mini Veggie Frattatas that I made and they are sooo good!! 

Ok ok I know I am no food photographer so please don't judge the recipe by my horrible picture! I promise you they taste reallllly good!

 Just take this into consideration - super easy to make, make them Sunday and store them in the fridge for the week, and you have a nice, warm, filling breakfast every morning after only 20 seconds in the microwave! 

Have I sold you yet? ;)

Be forewarned though, if you are not a fan of goat cheese you might not like these (and we probably can't be friends...jk I will probably still like you!). Now I am no chef, but I bet if there is another type of soft cheese you do like, it would probably work just as well...but don't hold me to that! 

You can find the recipe for these little guys by clicking here

Hopefully I will have a few more school related "made its" to post this time next week and can finally start checking some things off of my ever growing to do list

Tuesday, July 15, 2014

Dollar Store Treasures!


The Dollar Store is a dangerous, dangerous place for teachers! You go in for one thing and you leave with 50 things! Right?? I know it is not just me! ;) 

Here are some classroom treasures I picked up on today's trip and what I plan on using them for:

I plan on using these water cannons as pointers. They extend so they are great for little people to point way up high! I got the big ones to use with my ABC line, number line, or anything else that might be slightly out of their reach. 

I will use the shorter ones for Morning Message, reading big books, etc! 

Speaking of reading, I got these "reading glasses" to add to my library collection:

I mean, how fun are these?!?! 


Sorry, I couldn't resist ;) 

Also for my little library nook, I got these cute little paper lanterns to hang (I hope the fire marshal will cooperate):
Since there are 4 maybe I will spell out READ on them. Hmmm we will see.. 

I got these smelly and glittery pens for the writing workstation: 

For small group, I got these krazy and flamingo "pointers"

And this sweet little I am busy leave me alone working with a small group, please wait your turn light:


The light certainly wasn't my idea but for anyone who hasn't seen it on Pinterest, when you are working with a small group and do not wish to be disturbed you push the light on. When you are free again you can turn the light off. In my room I encourage my students not to come up while I am working with a small group period but some little friends need an extra visual reminder. 

These shot glasses are for when Mrs. Alexander is having one of those days... JUST KIDDING ;) I plan on writing letters, numbers, etc. on them and using them on the light table. 

I got two of these bad boys:
These plastic pockets have a handy dandy magnet on the back and I will use them on my white board easel as well as my word wall, which is a white board too. I tested the strength of the magnet (because I am one of those people) on one of the metal shelves at the Dollar Tree and put several things in the pocket. I think they will do the trick :) 

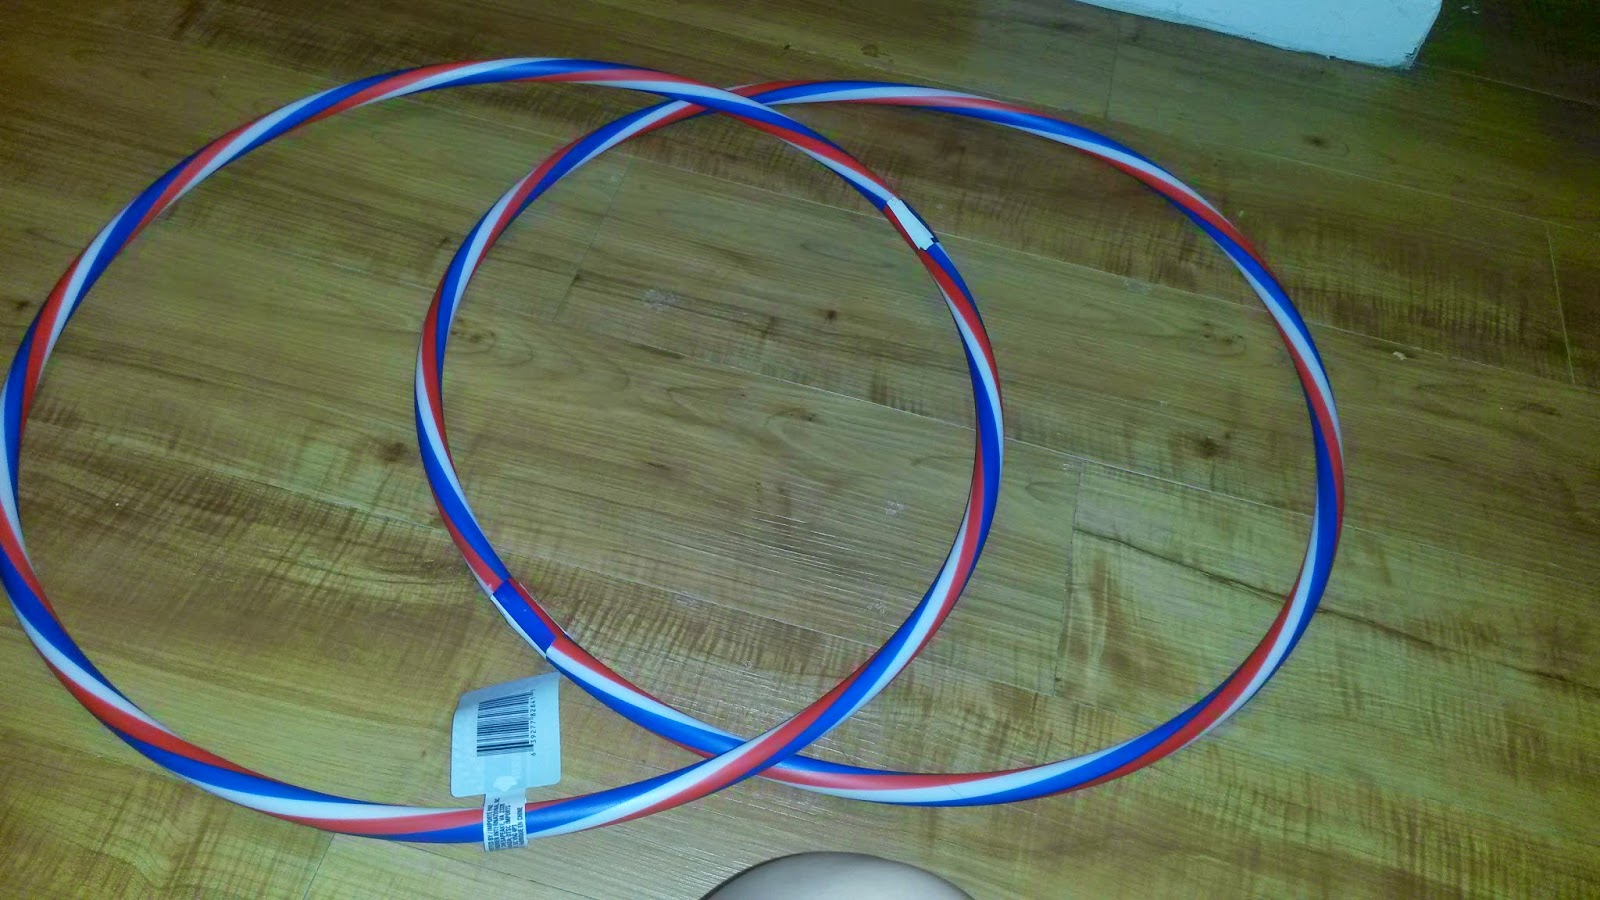
I have been using large hula hoops as for Venn Diagrams and other graphic organizers in the classroom, so when I saw these smaller ones, I could not resist
I think they will be perfect for workstations!

I also got these trays for sorting:

I also got a few clip boards for write the room activities. Although, I might decorate these plain Jane ones for my team and buy other ones for workstations.

I bought this index card holder to store all of my calendar pieces for the different months:

and these goodies are for my new "Teacher Binder" I plan to make:

I have not quite decided what I am going to use these for yet:
I am thinking I will use them for some sort of daily vote (for example: Do you have a pet?). One circle will be yes and the other no and students can move their name/picture from the rectangle cookie sheet (not pictured) to the appropriate circle. 

These cars can be used for a ton of beginning of the year activities! 

***To read more about these activities click on the picture, it will take you to the original link***

Name writing (and later sight words)

Letter Tracing (which can later be used to build CVC words)

Letter Matching (1st Upper to Uppercase than Upper to lowercase)

I am also going to use this beach ball for a letter ID game:

I bought this to hang my big A on the door (more on that later):

And these to clean up (obviously). Also, because they are too stinking cute! I LOVE the shark one!

And FINALLY **last thing I promise** I bought these:

To make these little cutties to hand out at Meet the Teacher:


PHEW! I know that was a lot but I wanted to write it allllllll down so that A) I could share it with you wonderful people and B) In a few weeks when I am setting up my classroom, I will not be like, "What the heck did I buy this for?!?" #realtalk ;)